Guide to Resetting MFA (Multi Factor Authentication) on a KCL Account
If you have replaced your mobile device or changed your mobile telephone number, this process is required to retain access to your KCL Account.
Please note, if you have replaced your mobile device and changed your mobile telephone number, you will need to make a request to have your MFA reset by the IT Service Desk.
1. Open your web browser and navigate to mfasetup.kcl.ac.uk. You will be asked to sign in, please use your k Number, followed by ‘@kcl.ac.uk’ (example: k123456@kcl.ac.uk)
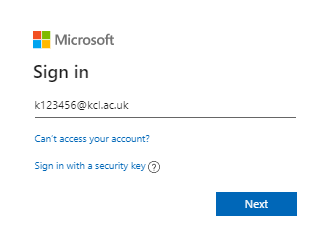
2. At this stage, you may be asked to enter your password. If this is the case, please do so.
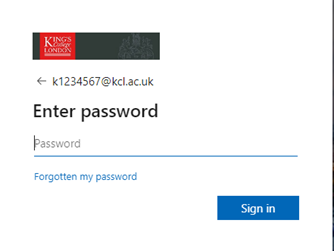
Alternatively, you may be presented with the below screen:
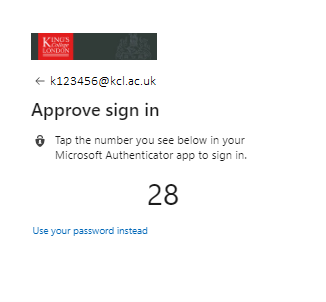
In this instance, please click, ‘Use your password instead’ and enter your password.
3. You will now see the below screen, asking to approve your sign in request:
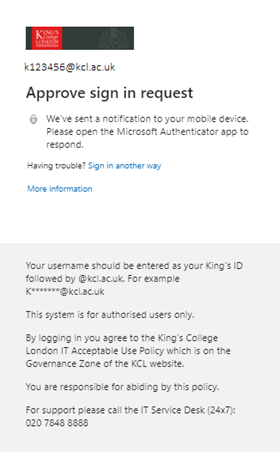
4. If you have changed your device but retained your mobile telephone number, please continue. If you have kept your device but changed your mobile telephone number, please skip to part 7.
You will be asked to approve your sign in. Please click, ‘Sign in another way’. You will be asked to verify your identity. Please click the ‘Text +XX XXXXXXXX’ option.
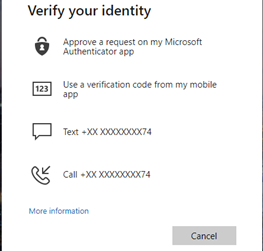
You will then receive a text message with a code, please enter the code on your computer when prompted.
You will be presented with the following screen:
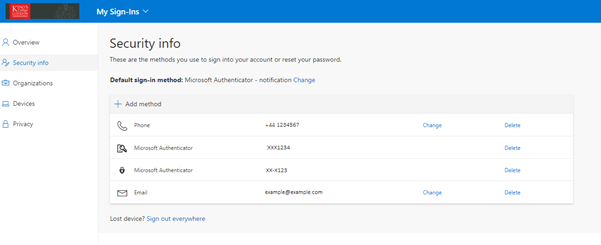
On the ‘Microsoft Authenticator’ line, please click ‘Delete’. You will then receive confirmation that your authenticator has been deleted.
5. Click ‘Add Method’. You will then see a drop-down list of methods, please select ‘Authenticator App’ and click ‘Add’.
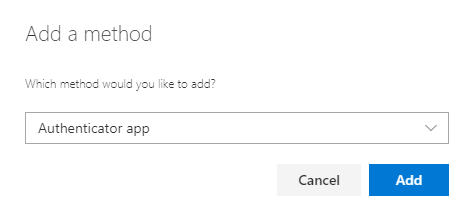
You will be prompted to download the authenticator app to your mobile phone. If you have not already acquired the app, this can be found on the App Store (iPhone) or Google Play Store (Android Phone).
6. Once the app has been downloaded, please click ‘Next’ on your computer. Open the App on your phone and you will see the following screen on your computer:
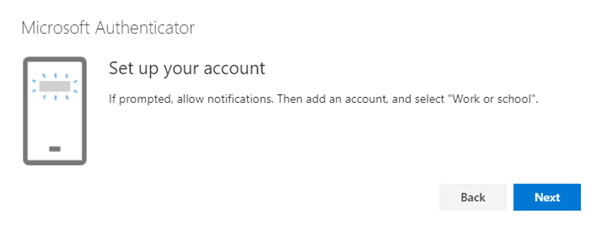
Click ‘Next’. You will be asked to ‘Scan the QR Code’. On your mobile phone, please tap ‘Scan a QR code’. If you are prompted to allow ‘Authenticator’ to take pictures and video, please select ‘ALLOW’. Hold your phone to your computer screen to capture the QR code.
On your computer, click, ‘Next’. You will then be prompted to test MFA. You will receive a notification to your mobile phone, please confirm then on your computer screen, you should now see ‘Notification Approved’.
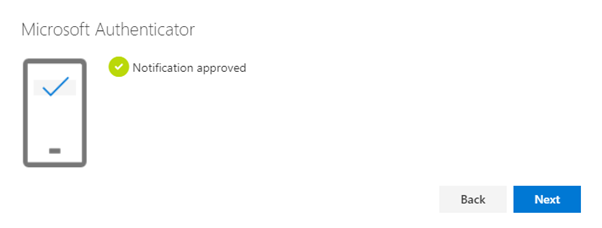
Click ‘Next’, MFA has now been set up.
7. You will be asked to approve your sign in, please approve this using the authenticator app on your mobile phone.
You will then be presented with the following screen:
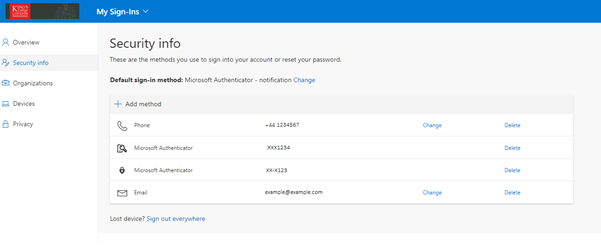
Next to the ‘Phone’ method, please click ‘Change’. You will be prompted to enter your new phone number, and select whether you would like to receive a text (through which you will receive a code) or a telephone call.
Please note: If you opt to be called, you will be asked to press the ‘Pound’ button. The UK equivalent is the Hash key.
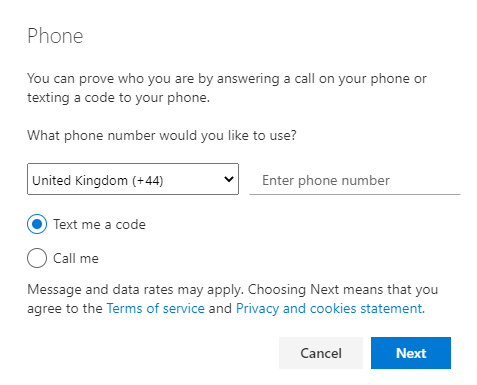
If you opt for the text, you will be presented with the following screen:
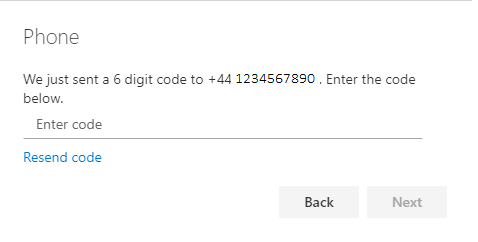
Enter the code you receive via text, and click ‘Next’. Your mobile phone number will now be updated.
If you would like to change your default sign in method, select the blue ‘Change’ button.

Once selected, you can click the drop down to choose from your list of set up methods.
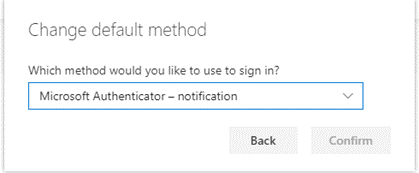
It is advised to select ‘Microsoft Authenticator’ as you will be able to sign in internationally.
The code from the authenticator can also be used without an internet connection or a connection to your mobile network provider.